
Connect
Connect Claude Desktop
There are two ways to connect Claude Desktop, and neither needs an official Anthropic account. We recommend Magpie: once the apps are installed, a few clicks in Magpie set everything up, with no developer mode and no gateway to type in. It takes about 10 minutes. If you'd rather not install Magpie, follow Configure third-party inference by hand.
Connect through Magpie (recommended)
The screenshots below show the Chinese interface; the English interface has the same layout.
-
Install Claude Desktop
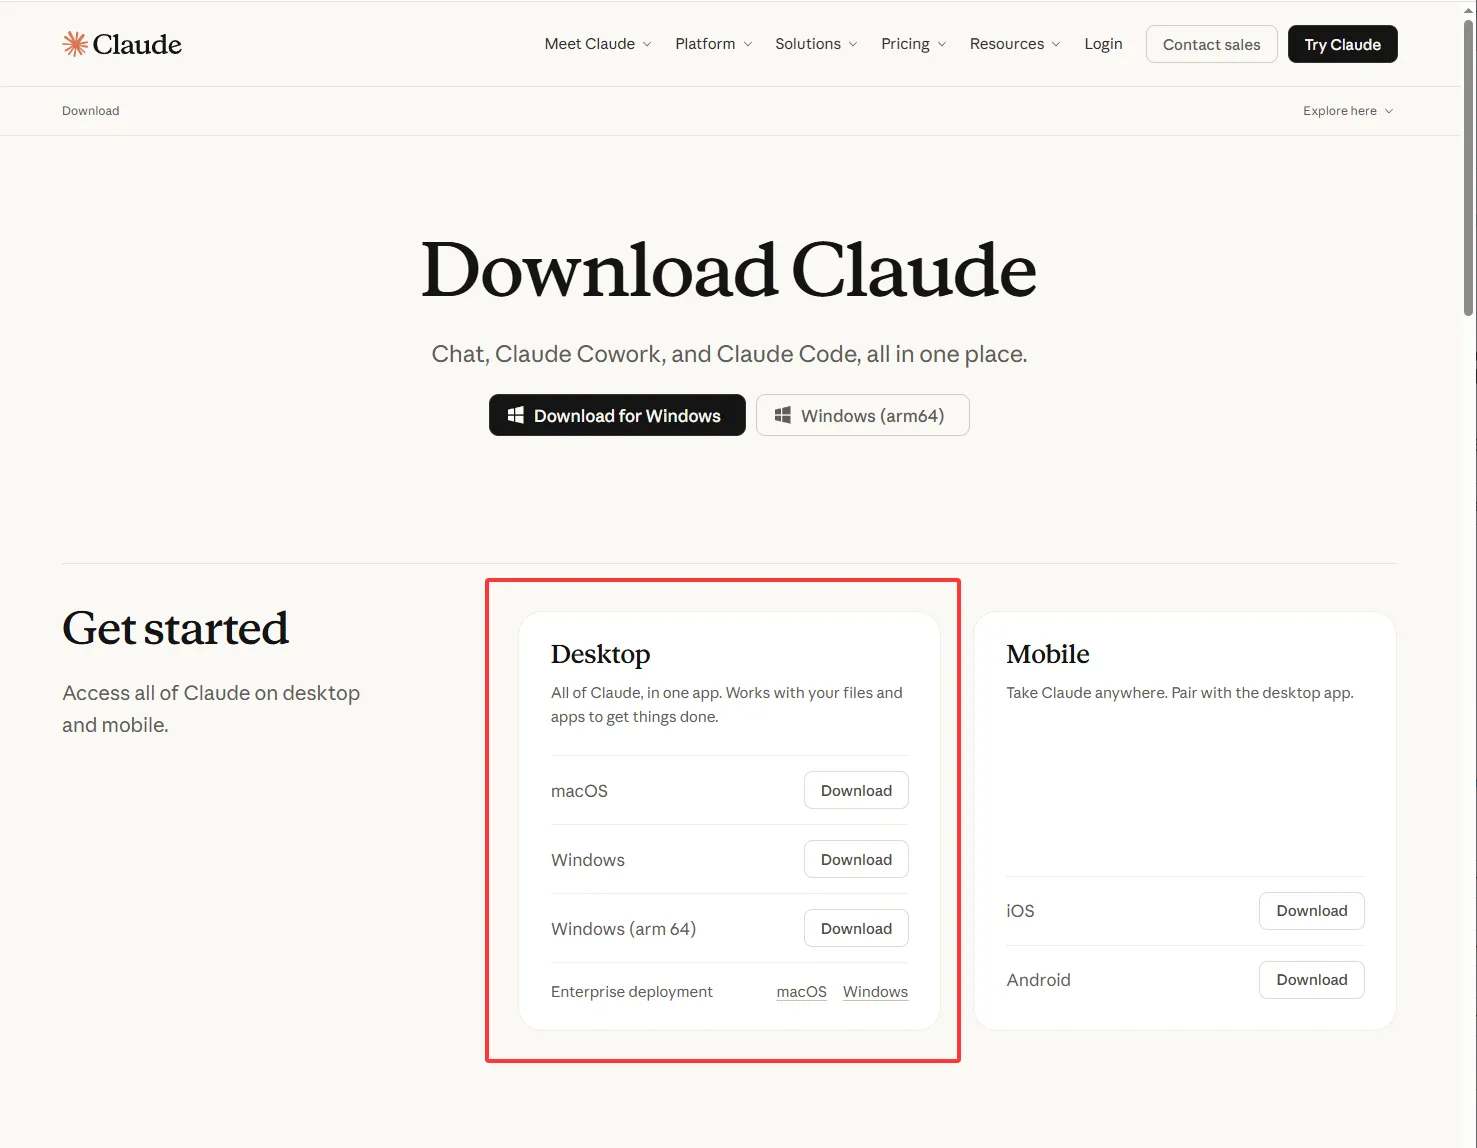
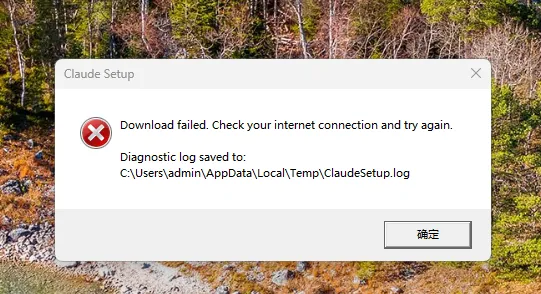
Download and install it from the Claude Desktop download page. If the Windows installer reports Download failed, see Install below.
Open it and leave it on the welcome screen. Don't click Get started and don't sign in to a Claude account; Magpie does the setup.
-
Create a key in the auto group
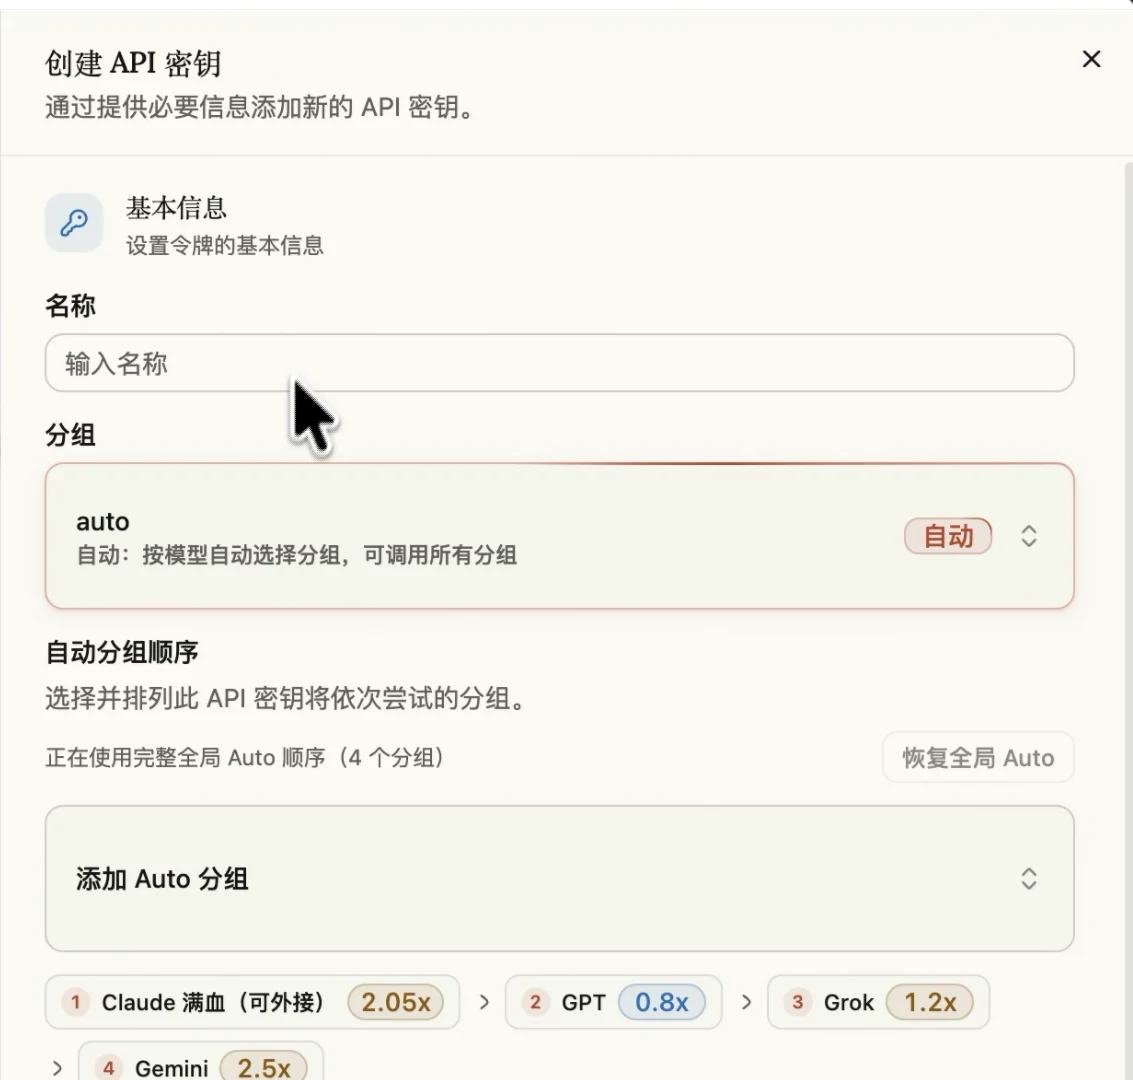
On the API Keys page, click Create API key, give it any name and keep the default group, auto. Requests that Magpie forwards don't come from Claude Code directly, so don't choose the 仅限CC group. In auto, Claude is billed at the 可外接 price; see Auto routing.
-
Install Magpie
Download it from the Magpie download page; it runs on macOS, Windows and Linux. Magpie is a local gateway that configures CoreCode's models into Claude Desktop.
-
Add CoreCode to Magpie
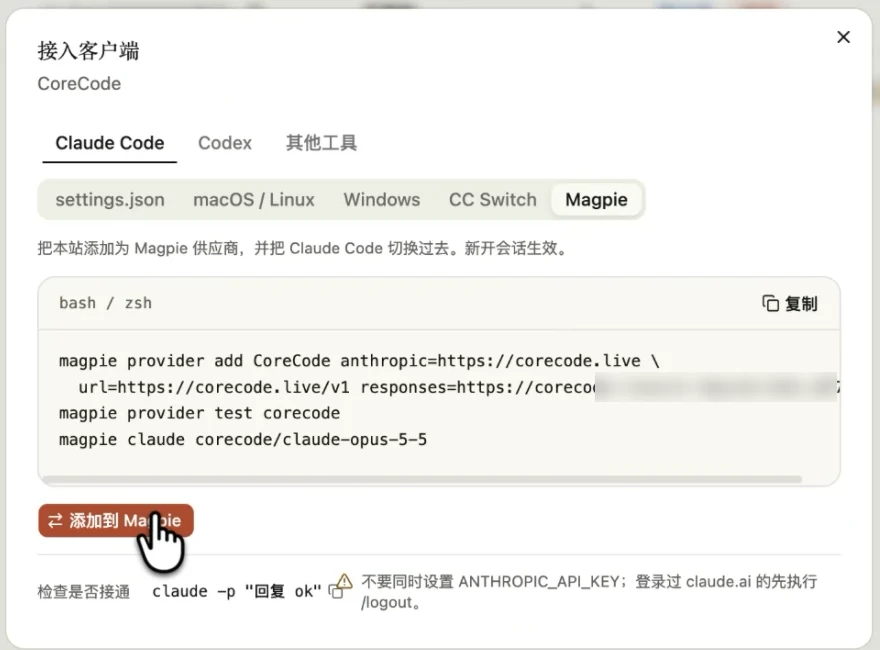
Back on the API Keys page, open Connect client on the key you just created, choose Magpie under Claude Code, click Add to Magpie, and confirm in the window Magpie opens.
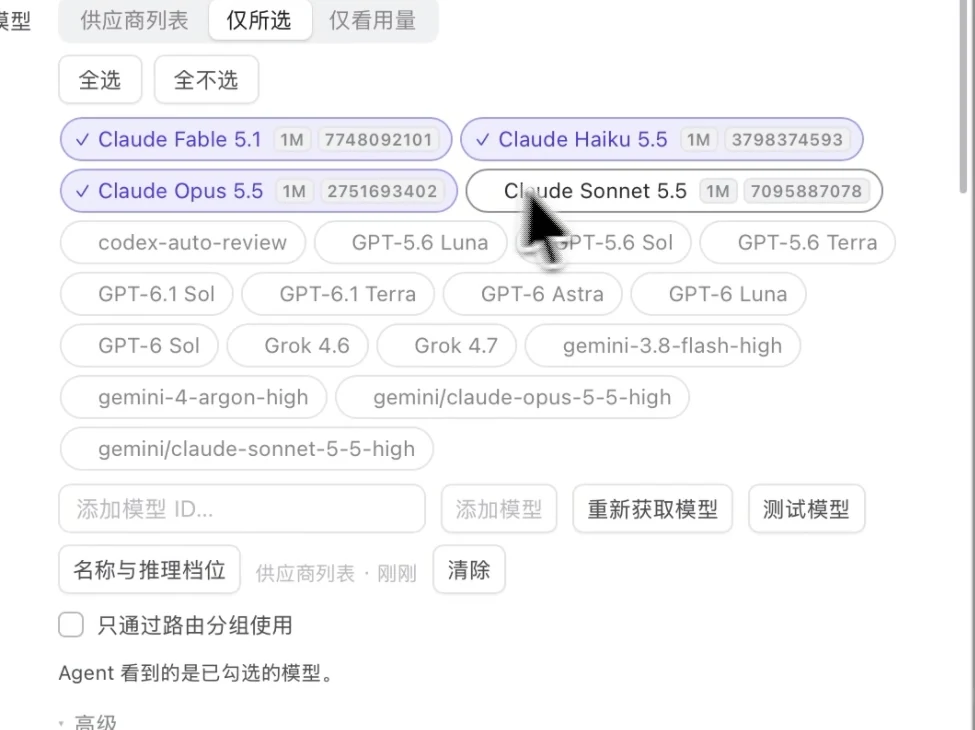
In Magpie's provider settings, tick only the Claude models you want: Fable, Opus, Sonnet, Haiku.
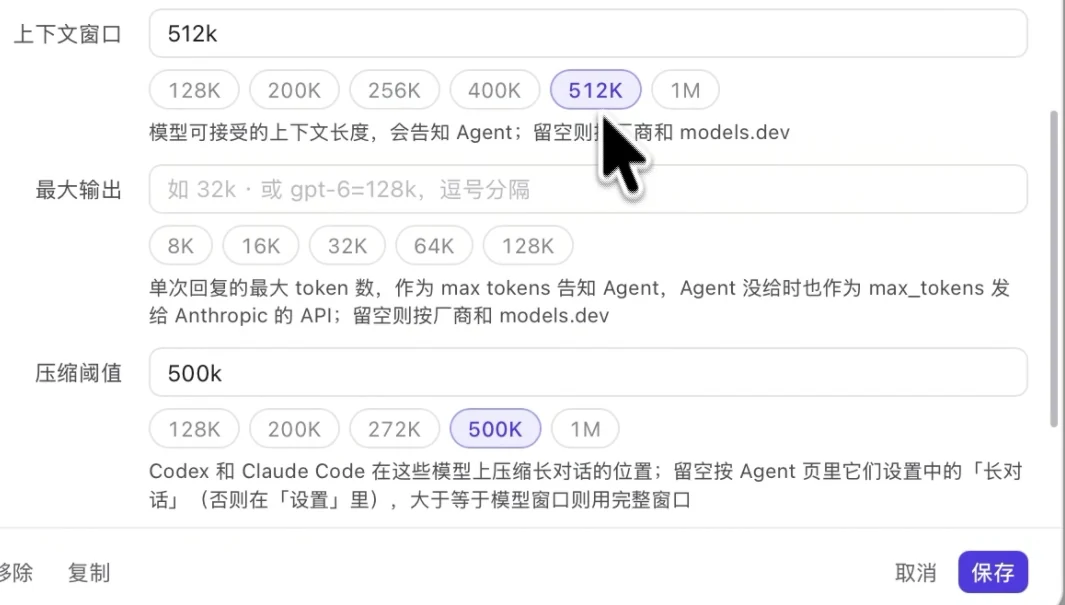
Set the context window to 512K and the compaction threshold to 500K, then click Save. The context can reach 1M, but the longer a conversation gets, the more each turn resends, so it costs more and answers get worse.
-
Connect Claude Desktop in Magpie
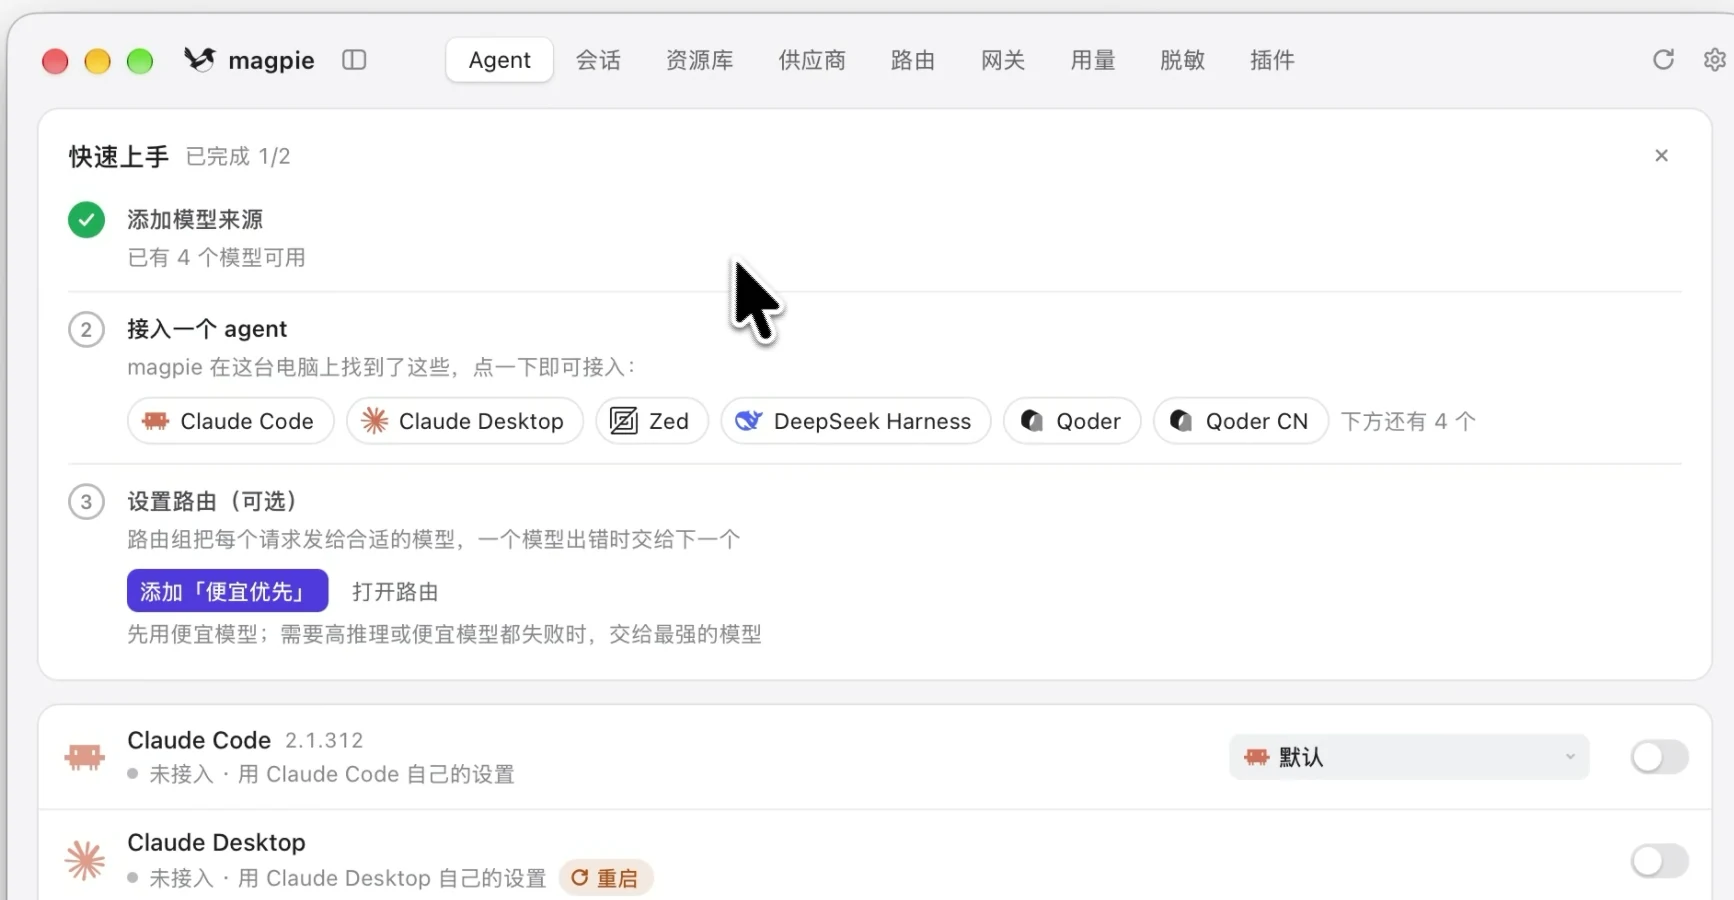
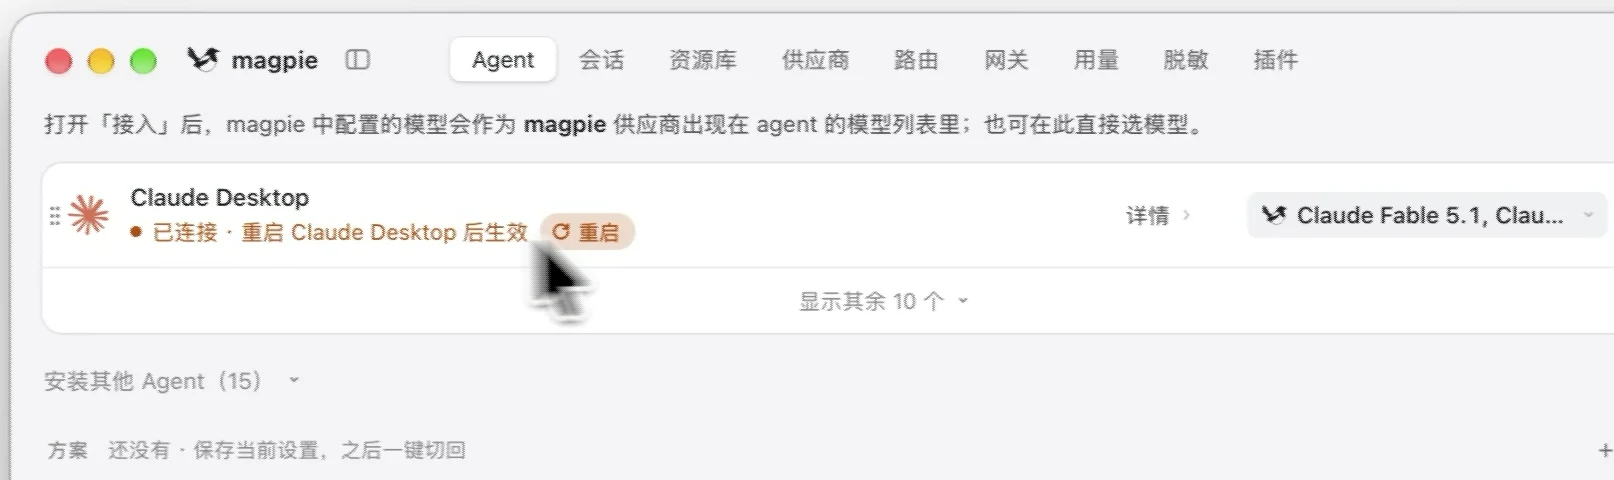
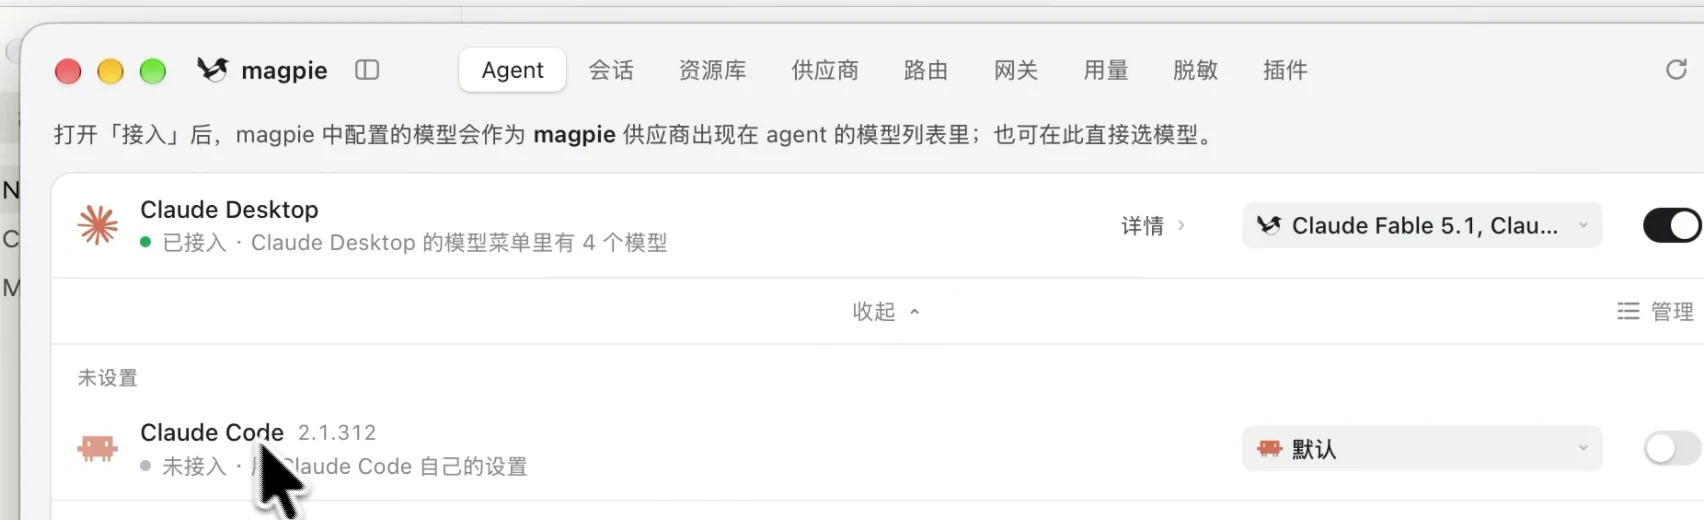
Switch to the Agent tab at the top of Magpie and click Claude Desktop under Quick start → Connect an agent. Details shows the models you just ticked.
Click Restart. Claude Desktop reopens straight into its main screen.
 Don't sign in to a Claude accountOnce Magpie is set up, Claude Desktop works without signing in.
-
Pick a model and start chatting
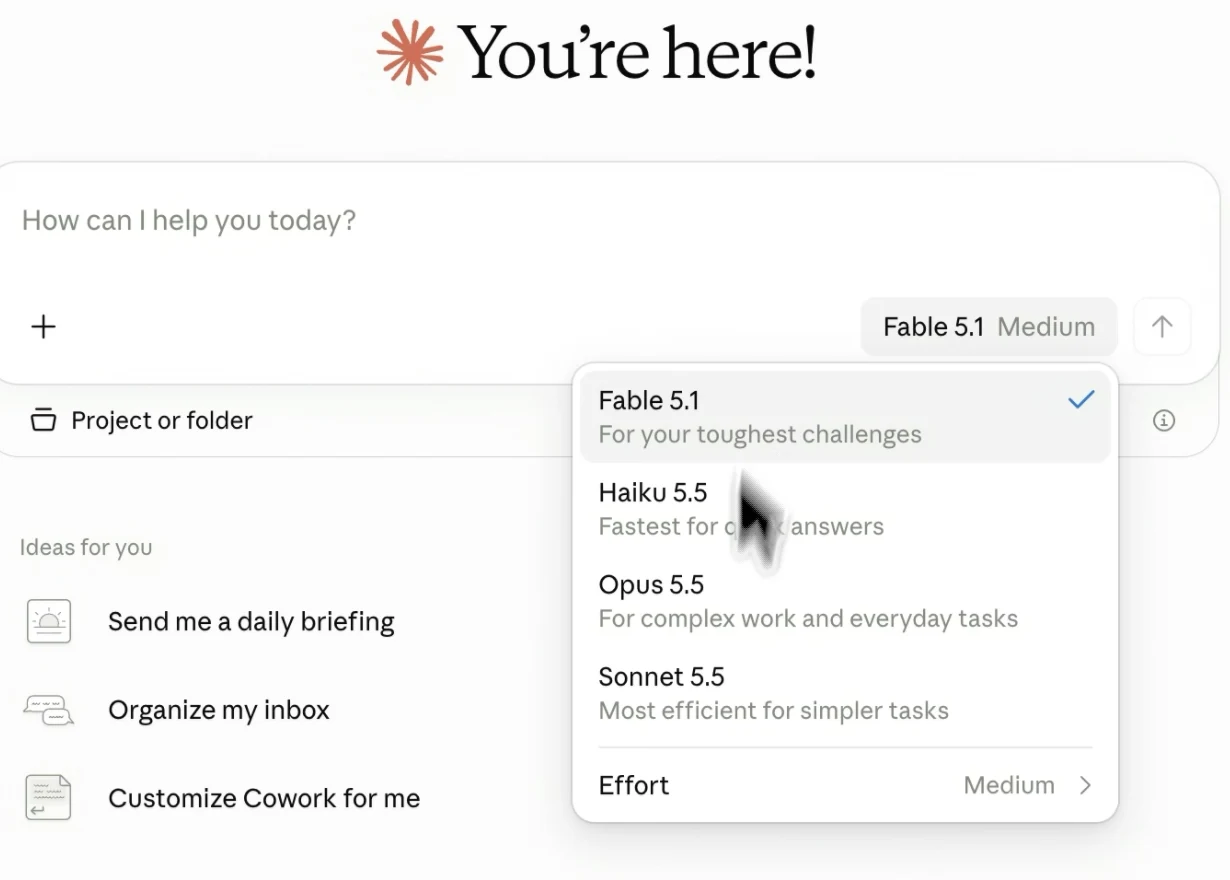
Switch models at the bottom right of the input box. Fable is the most capable and the most expensive; Opus or Sonnet suit everyday work. Send a message: when the request shows up in the console's Usage logs, you're connected.
Code mode
The switch at the top left moves between Cowork and Code. Code mode reads and writes files on your computer and runs commands; models are picked the same way as in Cowork.
Code mode starts in the Auto permission mode, which reviews each action before allowing it. With some settings every review is a separate request that costs tokens; see The cost of auto mode. Bypass permissions skips the review and its cost, but Claude then runs everything without asking, so use it only in projects you trust. To turn it on:
- Click your avatar at the bottom left and open Settings.
- Under Claude Code on the left, turn on Allow bypass permissions mode in Sessions.
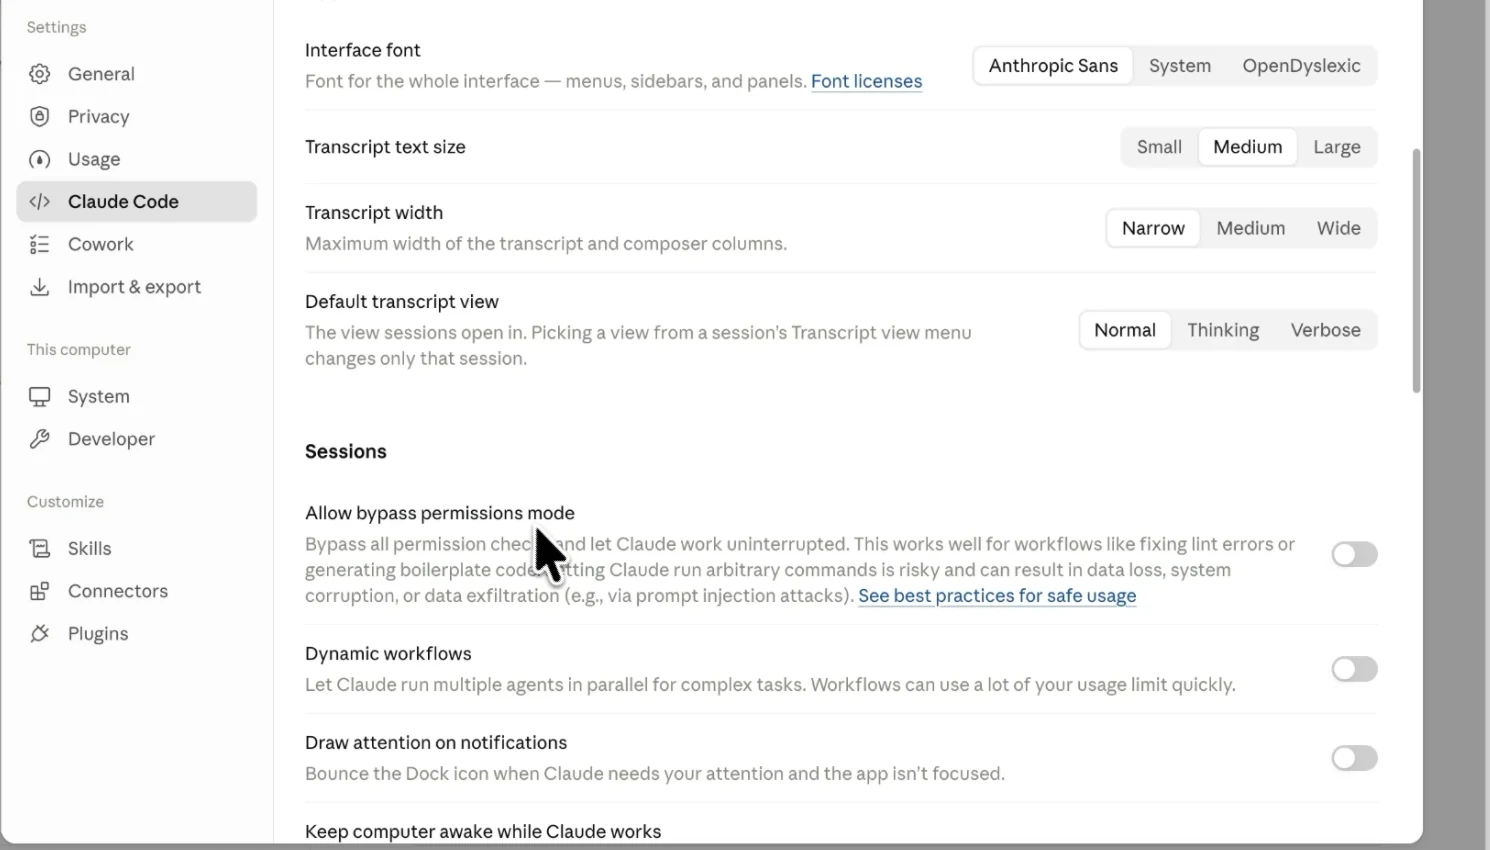
- Back in Code mode, choose Bypass permissions from the permission menu below the input box, then confirm with Bypass permissions in the dialog.
Claude Code on the command line
With the command-line Claude Code installed, find Claude Code on Magpie's Agent tab, turn on its switch and pick a model. See Magpie for more.
Configure third-party inference by hand
Claude Desktop's third-party inference can send requests to a custom gateway. Without Magpie, follow the steps below to point it at CoreCode.
https://corecode.livesk- key created on the console's API Keys page, in the Claude 满血(仅限CC) groupDownload
Open the Claude Desktop download page and download the installer for your system from the Desktop column.
Install
The Windows installer needs to reach Anthropic's servers. Run your proxy in global (TUN) mode, or the install fails:
If you would rather not use global mode, send the installer through the proxy from the command line:
- Find your proxy's local port; Clash Verge uses
7897by default.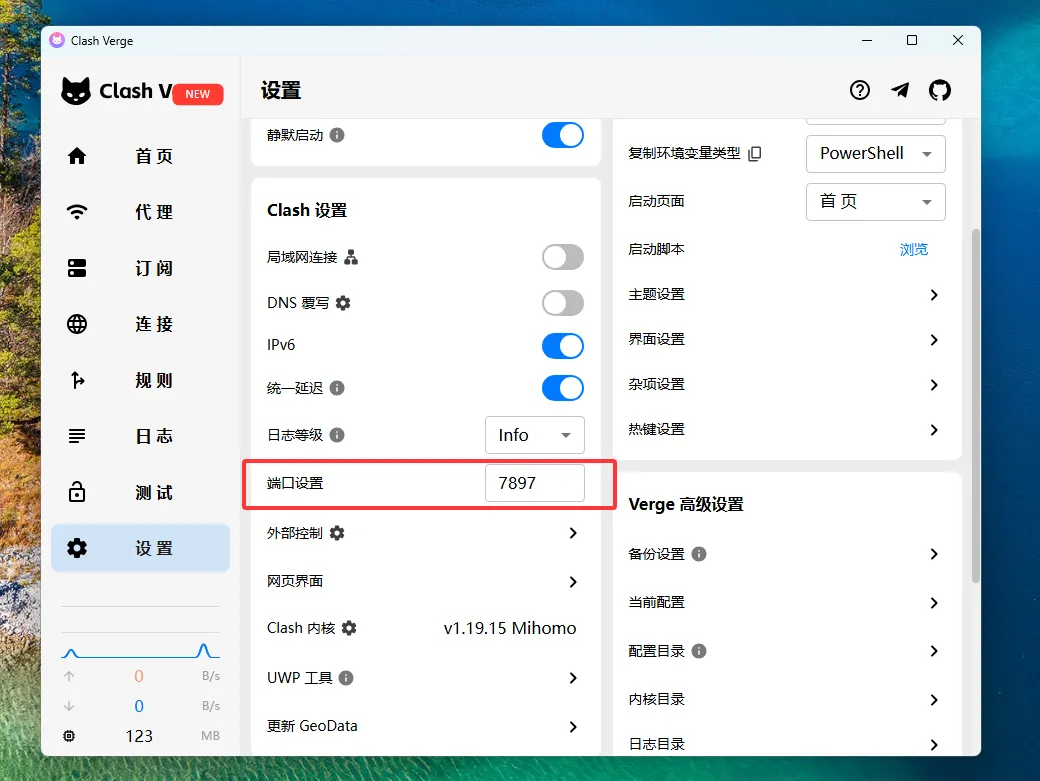
- Open
cmdin the folder that holds the Claude Desktop installer. - Run these commands in order (with your own port), and the installer starts normally:
set HTTP_PROXY=http://127.0.0.1:7897
set HTTPS_PROXY=http://127.0.0.1:7897
"Claude Setup.exe"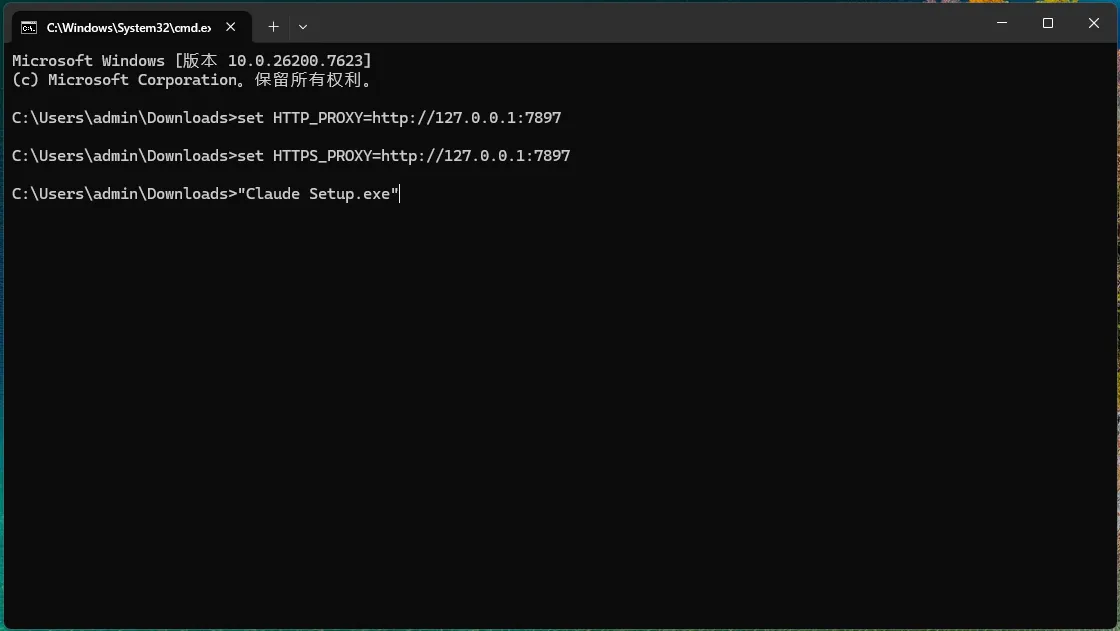
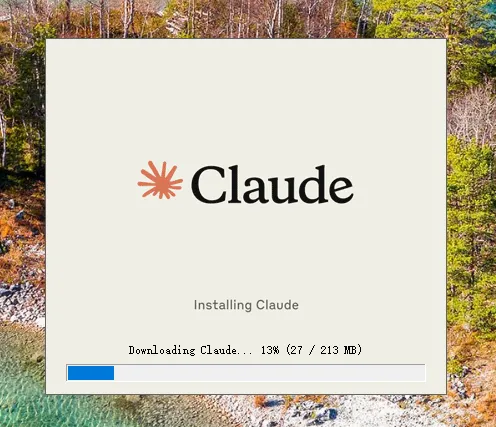
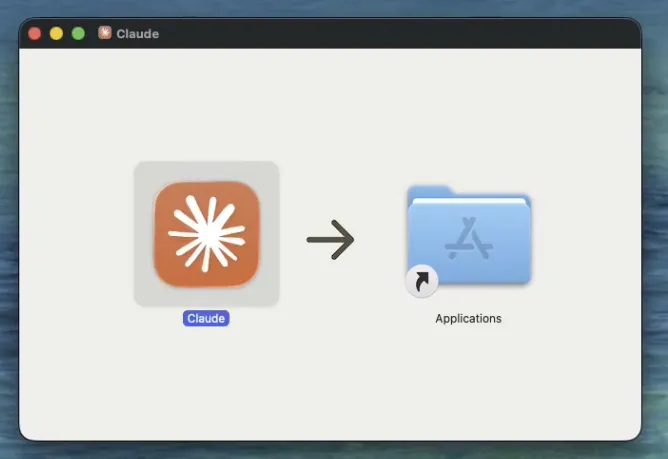
On macOS, open the installer and install as usual.
Turn on developer mode
The app opens on the sign-in screen. You do not need to sign in to an official account; the third-party inference setup below bypasses it.
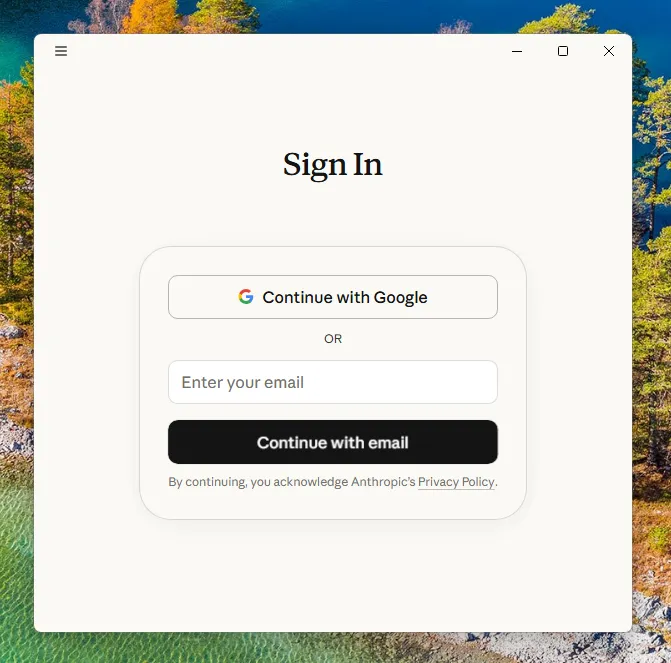
- Click the email box on the sign-in screen, then press
Tabto move to the menu at the top left. - Press Enter and go to Help → Troubleshooting → Enable developer mode.
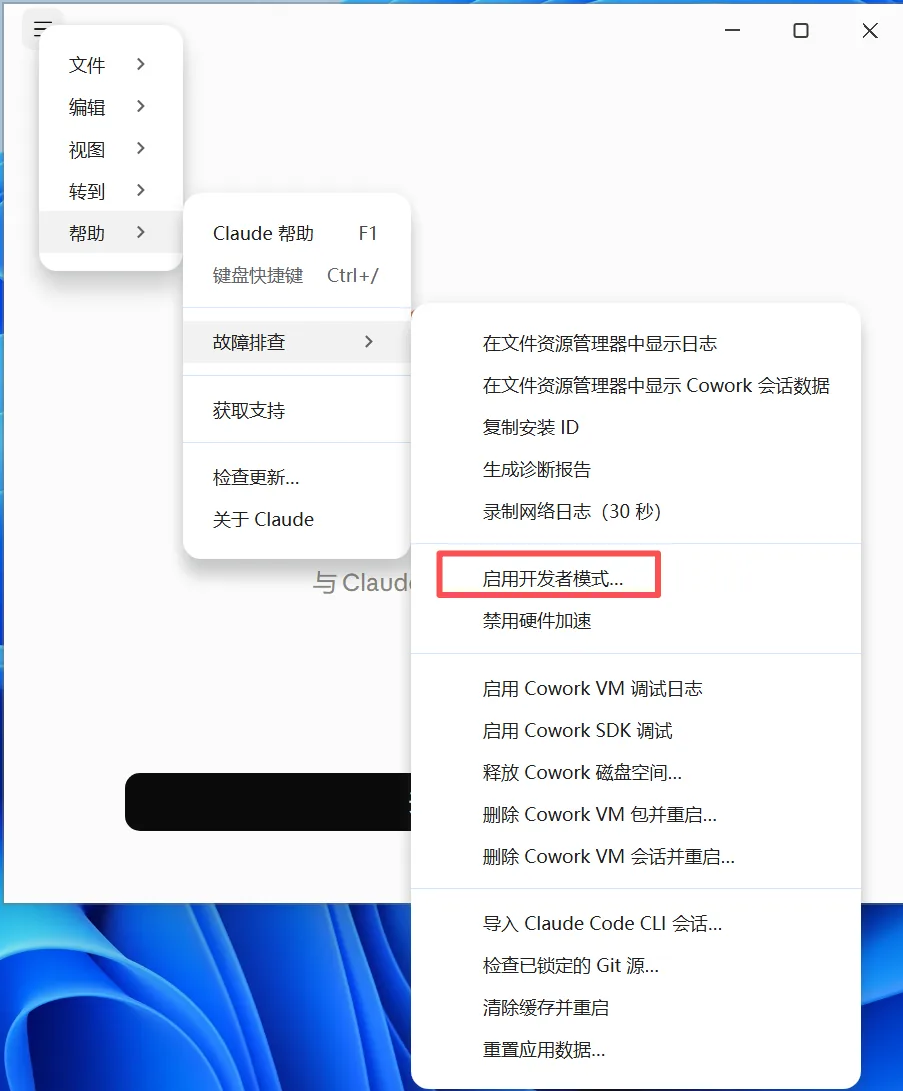
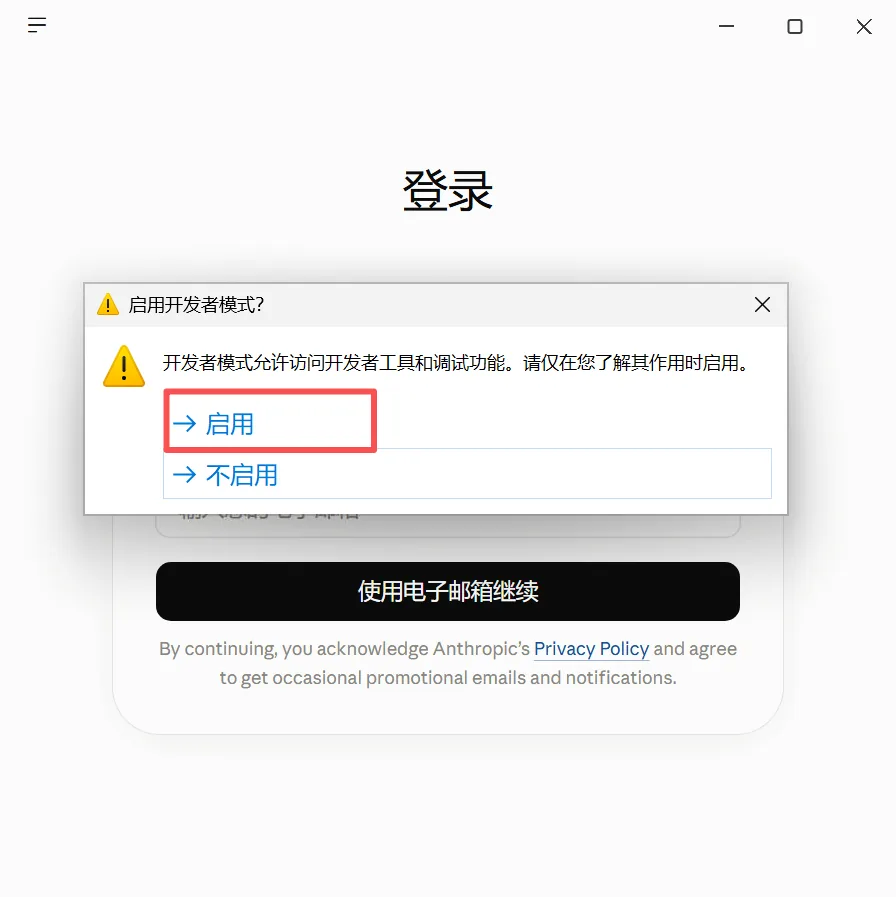
- Click Enable in the dialog; the app restarts.
- In the menu bar at the top left of the screen, go to Help → Troubleshooting → Enable Developer Mode.
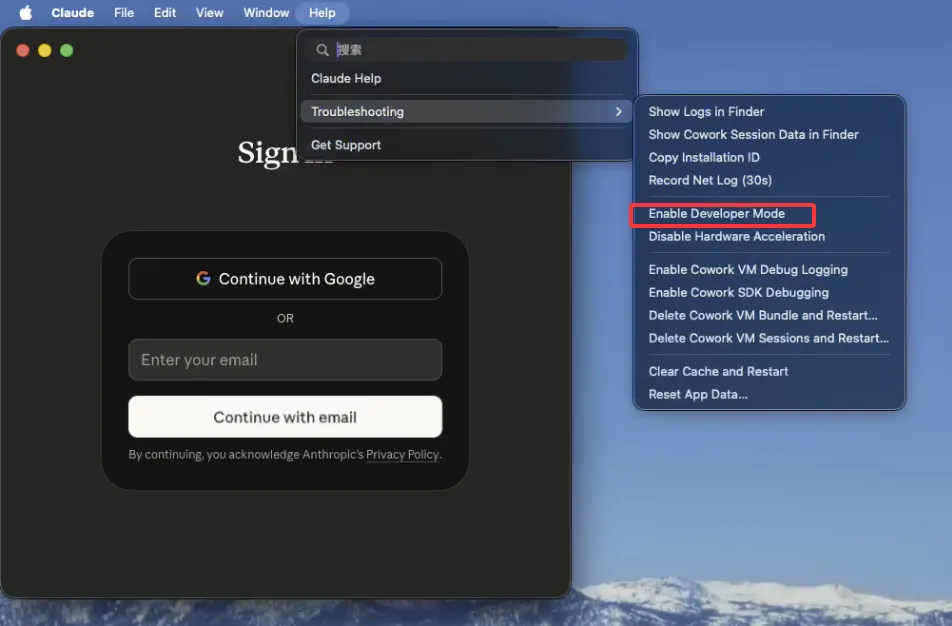
- Click Enable in the dialog and wait for the app to restart.
Configure third-party inference
Open the menu the same way and go to Developer → Configure third-party inference…, then fill in the table below:
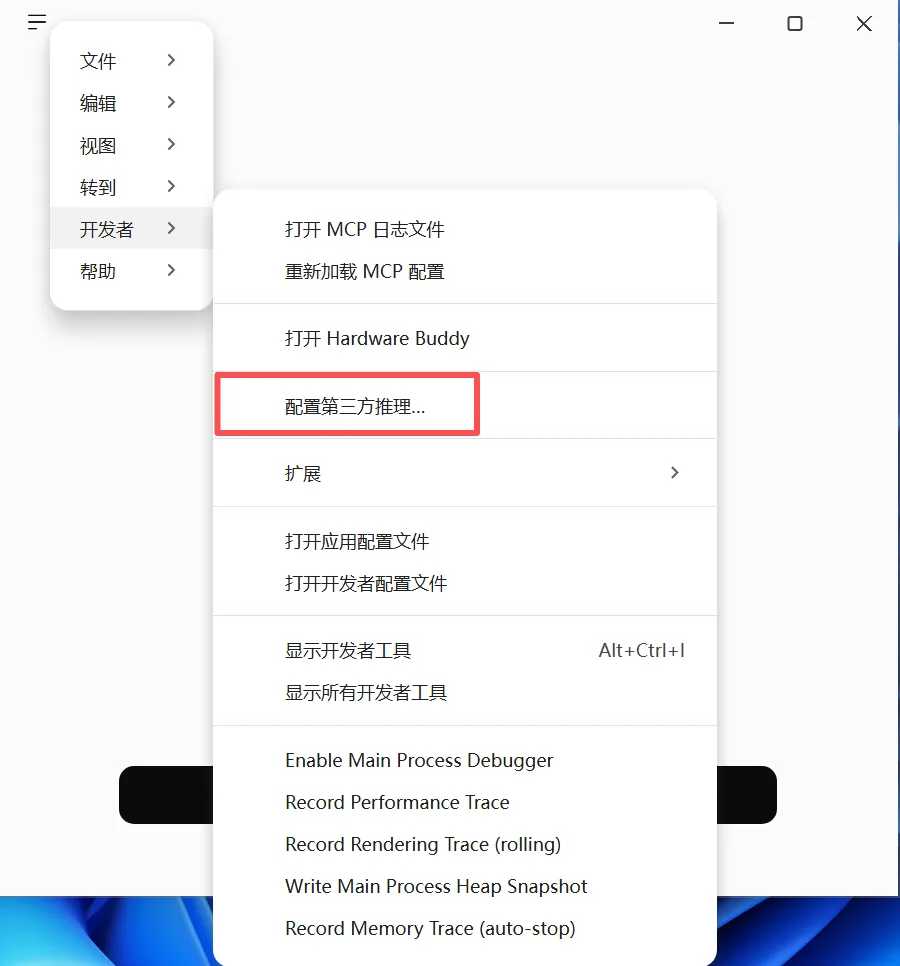
| Setting | Value |
|---|---|
| Gateway base URL | https://corecode.live |
| Gateway API key | Your sk- key (create one on the API Keys page if you have none) |
| Credential kind | Keep the default Static API key |
| Gateway auth scheme | Keep the default bearer |
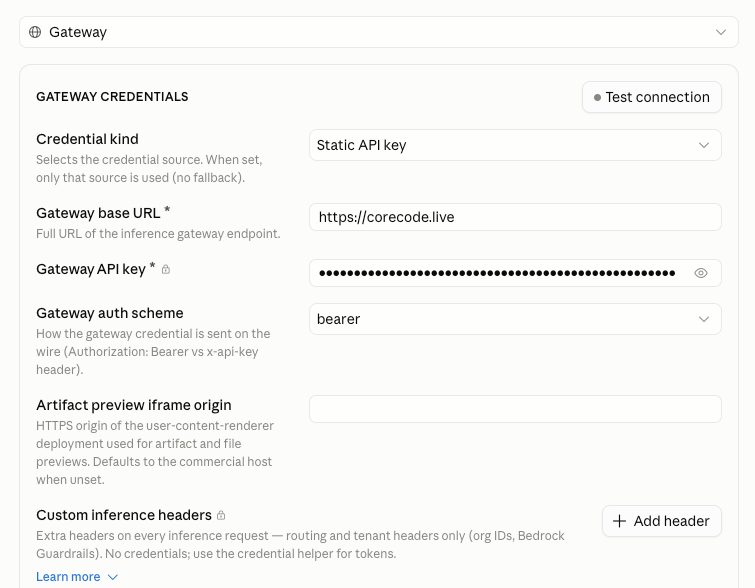
403 saying only requests from Claude Code are accepted. Your settings are not wrong; skip it. What matters is whether a chat works at the end.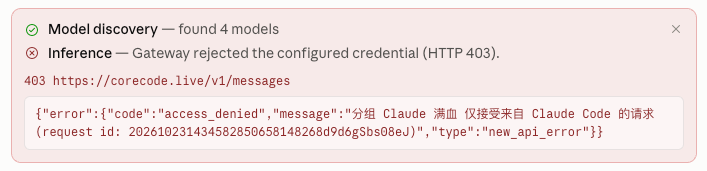
Next, set up the model list. Click Test model discovery at the top right of the MODELS card:
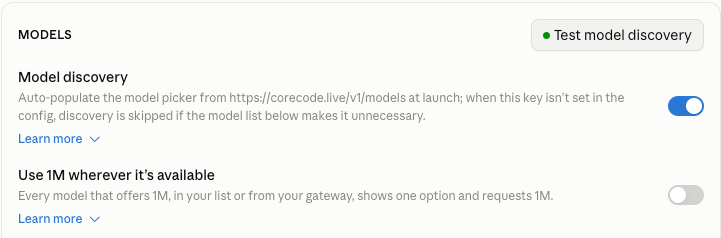
- Passes: keep Model discovery on (it is on by default). Models are fetched automatically and the bottom of the card shows how many were found.

- Fails: turn Model discovery off and click Add model to add models by hand, using the model name for both Model ID and Display name, for example
claude-opus-5-5.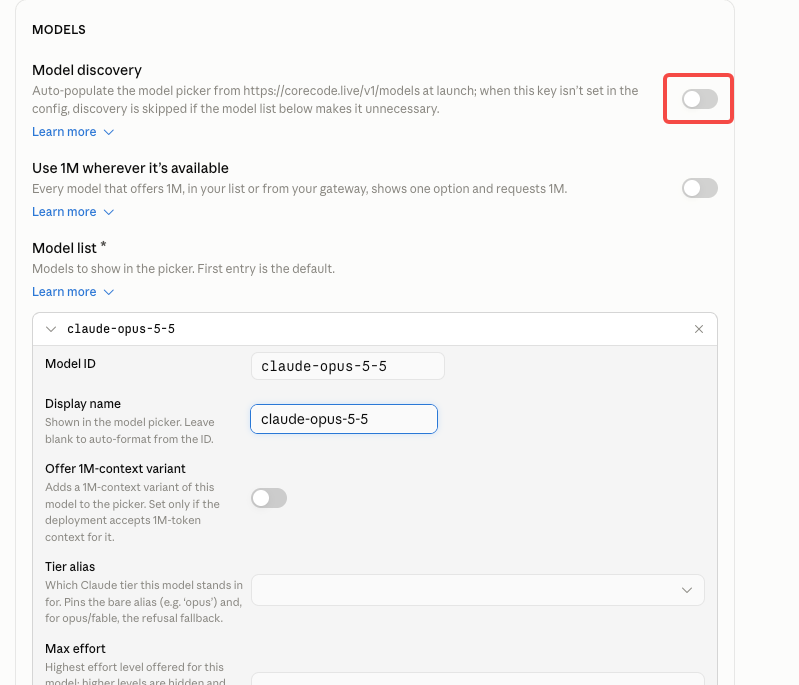
Finally click Save changes at the bottom right, then Apply changes, to save and apply the settings.
Start chatting
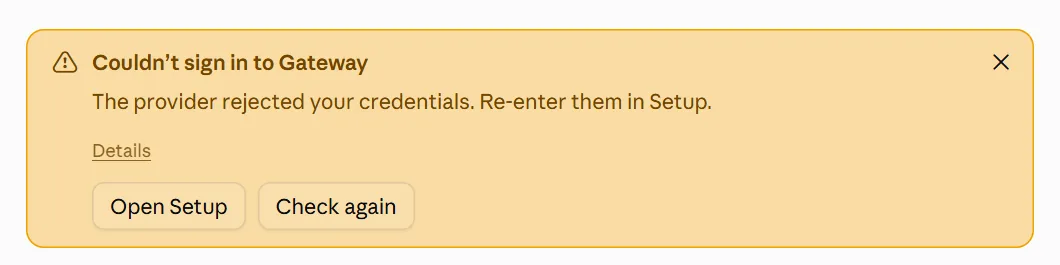
- Go back to the chat page. A warning such as Couldn't sign in to Gateway may appear at the top; ignore it, it does not affect use.
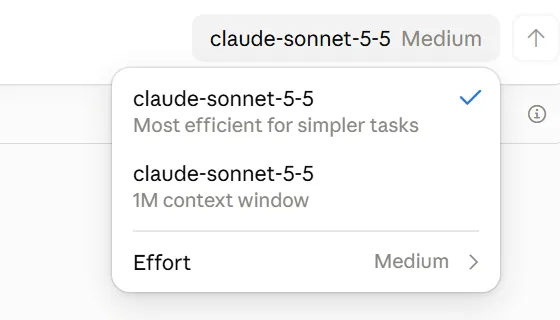
- Open the model picker and check that CoreCode's models are there.
- Send any message. A normal reply means the setup works; the request and its charge appear in the console's Usage Logs.
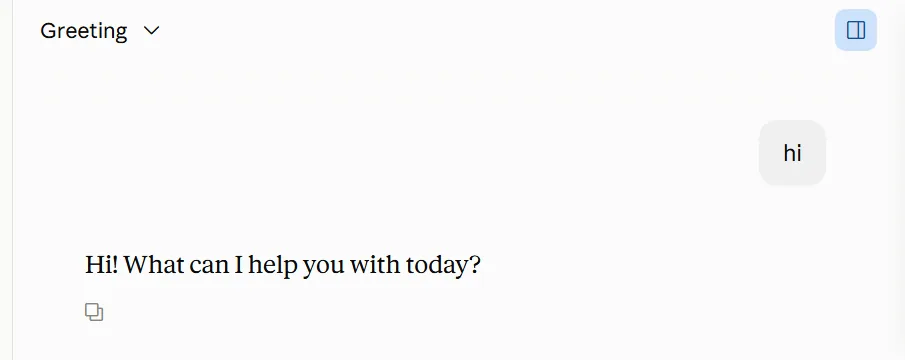
After the first message of a new chat, the usage logs may show an extra small call with a different model from the one you chose. That is Claude Desktop generating the chat title, and it is normal.